
![]()
The easiest way to get your Raspberry Pi connected to the Internet at the University of Virginia is to use an Ethernet cable. If you want to use wireless, pretty much the only option is to use the hidden “wahoo” network.
This is a quick tutorial for getting your Raspberry Pi to connect to the “wahoo” WiFi network at the University of Virginia.
I’m starting with a clean install of Raspberry Pi OS (follow the link for instructions on installing Raspberry Pi OS).
Step 1: Change Password
The very first thing you should always do with clean install of Raspbian OS is change the default password. Bad people on the Internet are looking for Raspberry Pis with default passwords so that they can hack in and take over. It’s just always best practice, and common-computer-security-sense to secure your computer with a password only you know. Never settle for the default! :)
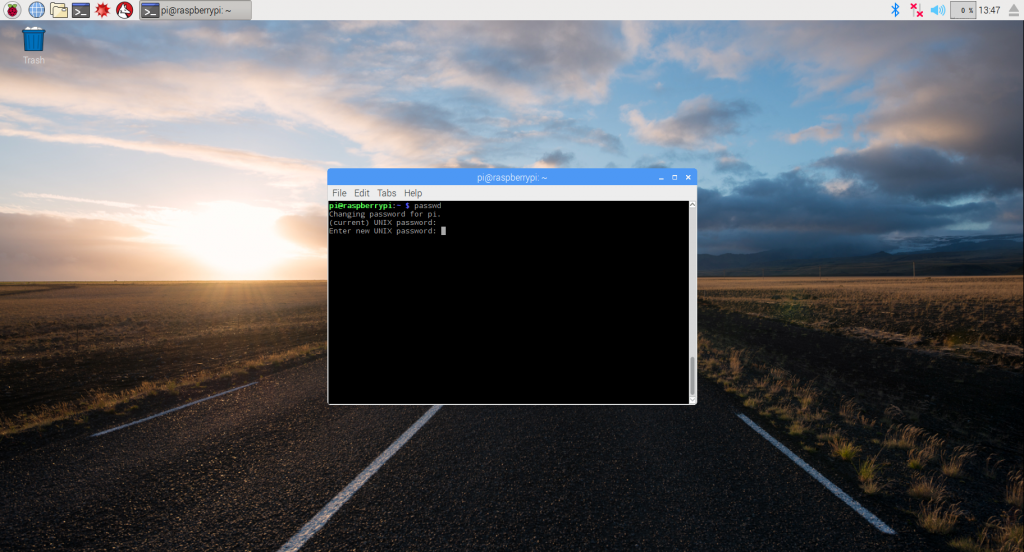
To change the password, you can use the Terminal. Open that up and type “passwd”, enter the current password “raspberry” (you won’t see any text typed), then hit enter.
Now type in a new password (again, you will see no text), hit enter, and type it a second time.
You can also change the password using the graphical interface (as shown in the next steps) on the “System” tab.
Step 2: Change Localization Settings
There are two ways to change these settings: 1. using the graphical interface, or 2. the command line. Pick one option and go with it.
2.1. Graphical

Go to the Raspberry Pi menu (the raspberry logo in the top left corner), then to Preferences, then to Raspberry Pi Configuration.
Under the Localization tab, you’ll want to change the Locale, Timezone, Keyboard and WiFi Country settings. (As a side note, you can also change the password under the “System” tab.)

For our purposes, you need to set the WiFi to “US”.
Don’t restart the system, yet. We have more to do.
2.2. Command Line
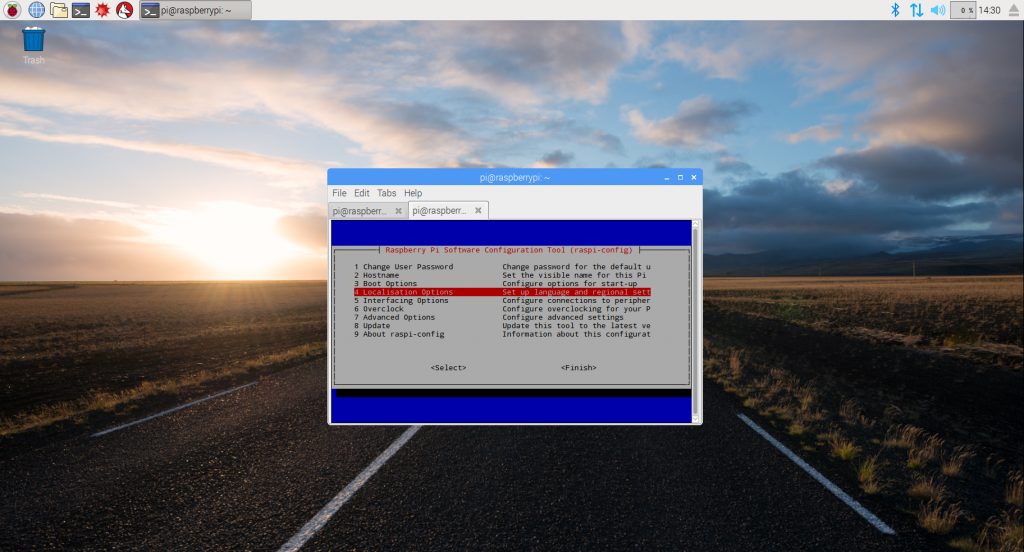
In the terminal, type “sudo raspi-config”. The screen will show a textual display of options. Select Localization Options, and from there change the Locale, Timezone and WiFi Country settings. (Note, you can also change the password using this tool.)
Don’t restart the system yet. We have more to do.
Step 3: Edit System Config
The newest Raspbian OS (Stretch) changed the way the network is handled, so pick the “Stretch” or “Pre-Stretch” (like Jessie, and before) options as necessary.
3.1. Stretch
Change the /etc/wpa_supplicant/wpa_supplicant.conf file. You’ll need to open the file with root privileges, so we’ll use the terminal to open a program for editing the file.
In the Terminal, type in:
sudo leafpad /etc/wpa_supplicant/wpa_supplicant.conf
There should only be three lines in there now. We’ll add some lines to let the network system know about the hidden ESSID. The file should now look like this:
country=US
ctrl_interface=DIR=/var/run/wpa_supplicant GROUP=netdev
update_config=1

network={
 ssid="wahoo"
 scan_ssid=1
 key_mgmt=NONE
}
The code is pretty self explanatory.
The “ssid” is the hidden wahoo. The “scan_ssid” does a direct Probe Request which is required when a network hides the ssid. The “key_mgmt” line lets the network know that there is no password required. UVA’s wahoo network is secured by only allowing a registered MAC address onto the network. You’ll be doing this in Step 4.
Save and close that file and you’re just about done. Continue on to Step 4.
3.2. Pre-Stretch
Change the /etc/network/interfaces file. You’ll need to open the file with root privileges, so we’ll use the terminal to open a program for editing the file.
In the terminal, type in:
sudo leafpad /etc/network/interfaces
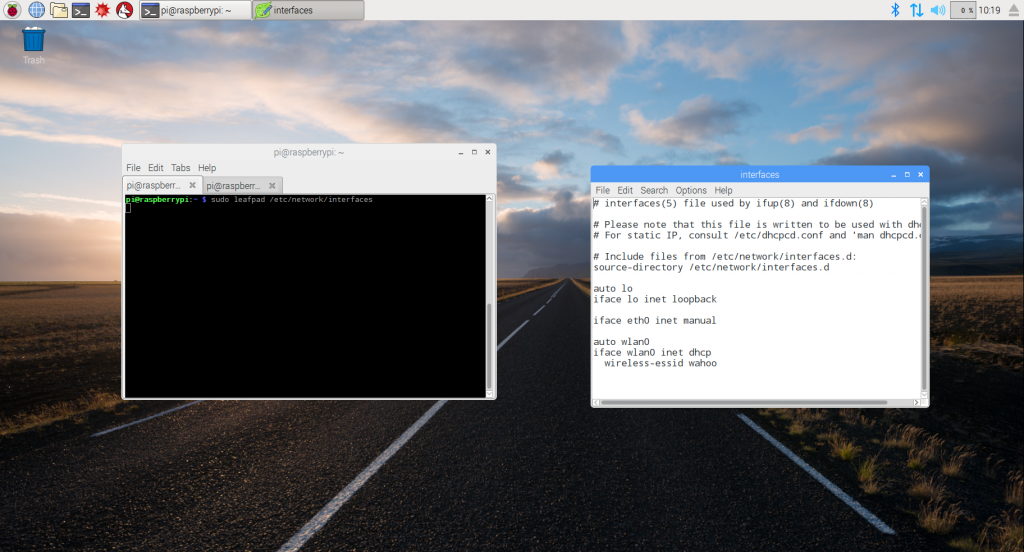
Towards the bottom of the file are two sections for a “wlan0” and “wlan1”. Delete those lines, and in place of them add in three new lines for “wlan0” (indent the third line with four spaces or a tab).
auto wlan0
iface wlan0 inet dhcp
    wireless-essid wahoo
What this code does:
auto wlan0 = this will automatically turn on the wireless card
iface wlan0 inet dhcp = this declares an interface card called wlan0 allowed to connect to the TCP/IP network (the Internet) using DHCP (basically, the router will give your Pi an IP address).
wireless-essid wahoo = look for the wireless Extended Service Set Identification named wahoo.
The entire file should look like this:
# interfaces(5) file used by ifup(8) and ifdown(8)

# Please note that this file is written to be used with dhcpcd
# For static IP, consult /etc/dhcpcd.conf and 'man dhcpcd.conf'

# Include files from /etc/network/interfaces.d:
source-directory /etc/network/interfaces.d

auto lo
iface lo inet loopback

iface eth0 inet manual

auto wlan0
iface wlan0 inet dhcp
  wireless-essid wahoo
Step 4: Get WiFi MAC Address
While you have the Raspberry Pi on and the terminal open. Grab the MAC address for the wireless card.
In the terminal type
ifconfig
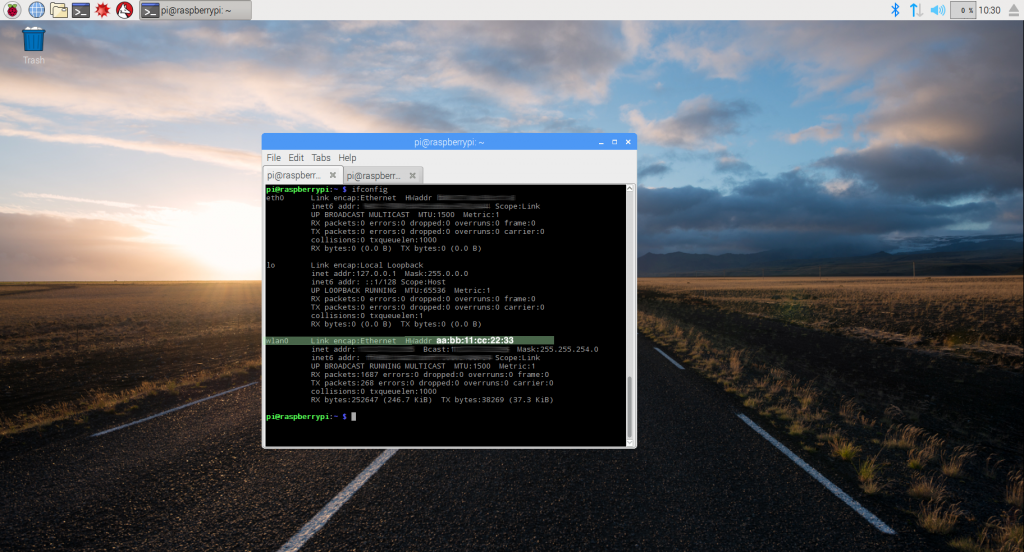
Now look for the section for the “wlan0” and on the first line you’ll see information for a “HWaddr” or Hardware Address. It will be in the format
aa:11:bb:22:cc:33
The HWaddr is the MAC address. Write the MAC address down on a piece of paper, you’ll need for the next step.
Register the MAC Address
You will need a computer or mobile device that already has an Internet connection in order to complete this step.
In order to get your Raspberry Pi connected to the ‘wahoo’ network, you will first need to register the MAC address with ITS.
Follow this link to the ITS Registration page: https://netreg.itc.virginia.edu/cgi-bin/mac_registration.cgi?alien=1
ITS suggests getting a static IP on the more secure network. You can make that request through ITS help desk.
If on the more secure network, your computer must be on that network as well if you want to SSH into the Raspberry Pi. You can connect to that network through the ITS provided CISCO VPN client.
Restart the Pi
Now you can restart the Raspberry Pi. When it boots up, it will automatically detect and connect to the “wahoo” network.